When you face common plumbing maintenance issues, it might initially seem overwhelming. Tackling these problems yourself can save time and money. Understanding basic solutions is key, whether it’s a dripping faucet that keeps you up at night or a stubborn clogged drain. You’ll need to know when to turn off the water, which tools to use, and how to perform simple repairs. But what about those persistent issues like low water pressure or mysterious sewer odors that won’t go away? These challenges require a bit more strategy, and here’s where the real insights begin.
Fixing a Dripping Faucet
To fix a dripping faucet, turn off the water supply to prevent leaks or spills. Locate the shut-off valve beneath the sink and twist it clockwise. If there’s no individual valve, you might need to turn off the main water supply for the house. After ensuring the water is off, open the faucet to release any remaining water in the pipes. If leaks persist, it might be time to consider professional plumbing repair services to address underlying issues effectively.
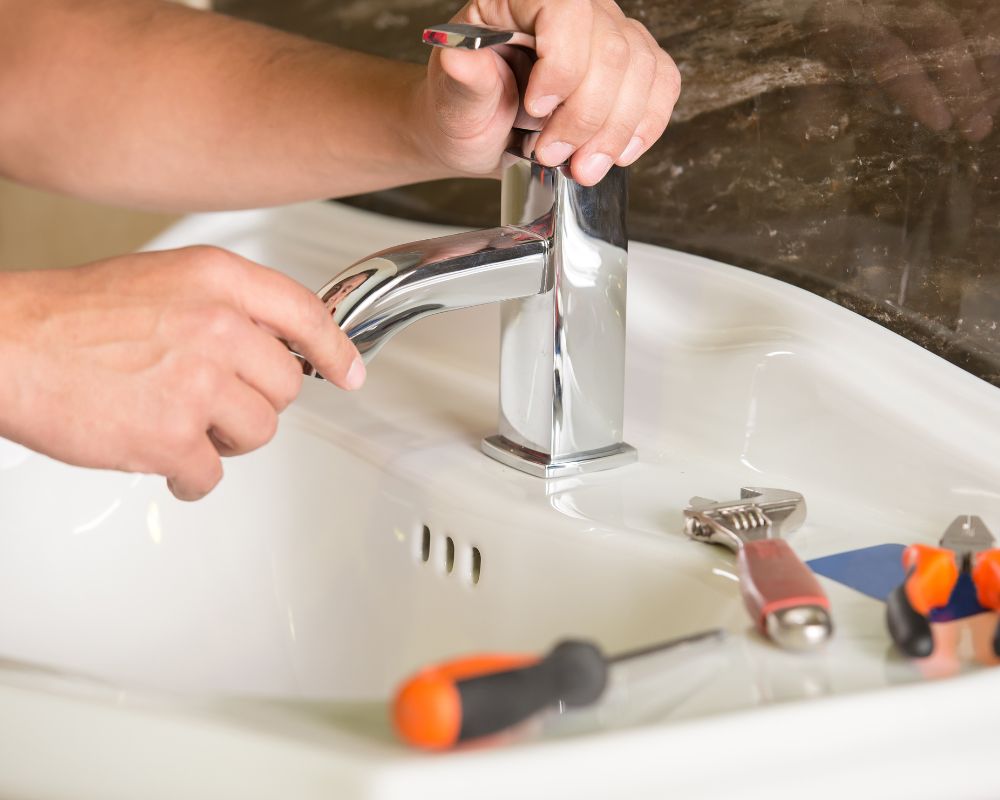
Next, plug the sink drain with a rag or stopper to avoid losing small parts. Use a screwdriver to remove the handle of the faucet. You may need to pry off a decorative cap to access the screw. Once the handle is off, you’ll see the packing nut. Loosen it with an adjustable wrench, then remove the stem from the faucet assembly.
Inspect the washer at the bottom of the stem, which is often the culprit for drips. If the washer appears worn or damaged, replace it with a matching one. Reassemble the faucet by reversing the steps, ensuring each component is secure. Turn the water supply back on gradually, checking for leaks. Following these steps will restore the faucet’s efficiency, preventing water waste and serving others effectively.
Unclogging a Blocked Drain
Start by removing visible debris from the drain to prevent further blockage and guarantee smooth water flow. Wear gloves to protect your hands, and use a flashlight to inspect the drain for any trapped items like hair or food particles. Once cleared, test the drain by running water and observing the flow. Persistent issues might require drain cleaning services to eliminate blockages and maintain optimal performance.
If the blockage persists, grab a plunger. Verify there’s enough water in the sink or tub to cover the plunger’s cup, creating a strong seal. Position it over the drain, push it down firmly, then pull it up quickly. Repeat this motion several times to dislodge the obstruction.
Should plunging prove ineffective, consider using a drain snake. Insert the snake into the drain, turning the handle clockwise to hook onto the clog. Gently pull it out along with any debris. Rinse the drain with hot water to verify it’s clear.
A mixture of baking soda and vinegar can be effective for stubborn clogs. Pour half a cup of baking soda and half a cup of vinegar into the drain. Let it fizz for 15 minutes, then flush with hot water. Always prioritize safety and use protective gear when handling chemicals.
Repairing a Running Toilet
A running toilet often signals a problem with the flapper, so begin by removing the tank lid and inspecting the flapper for any signs of wear or improper sealing. If the flapper looks worn or damaged, replace it. Turn off the water supply to the toilet, flush to empty the tank, and detach the flapper from the chain and hinges. Attach the new flapper, ensuring it creates a proper seal against the flush valve.
If the flapper is fine, check the chain connecting it to the toilet handle. The chain should have a bit of slack but not be too loose. If necessary, adjust the length by repositioning the hook on the chain.
Next, examine the fill valve. If the water level is too high, adjust the float. For a float arm, bend it slightly downward; for a float cup, slide it down the rod.
Stopping Low Water Pressure
Identify the source of low water pressure by checking if it’s affecting all fixtures or just specific ones. Your main water supply might be the culprit if it’s a widespread issue. Here’s how to address it effectively:
- Check the Main Valve: Verify that the main shutoff valve is fully open. It’s usually located near your water meter. If necessary, turn it counterclockwise to maximize flow.
- Inspect the Pressure Regulator: If your home has a pressure regulator, it might need adjustment. Use a wrench to tighten the screw on top to increase pressure, but proceed carefully to avoid damage.
- Examine Aerators and Showerheads: Mineral buildup can restrict flow. Unscrew aerators or showerheads, soak them in vinegar for an hour, then scrub away residue before reinstalling them.
- Investigate Water Supply Issues: If pressure remains low, contact your local water department, as they might be performing maintenance or experiencing issues.
If only certain fixtures are affected, the problem might be isolated. Clean the affected fixtures or check for partially closed valves along the supply line. Identifying and addressing these potential issues can restore proper water pressure and guarantee a more pleasant experience for those you serve.
Addressing Leaky Pipes
To tackle leaky pipes, first, locate the exact source by inspecting visible pipes for drips or moisture. Check under sinks, behind toilets, and in basements or crawl spaces. Once found, turn off the water supply to prevent further damage. This step guarantees you work in a safe environment and prevents water wastage.
Next, dry the area around the leak. Use a clean cloth to remove any moisture, allowing you to apply a repair solution effectively. For minor leaks, consider using plumbing tape or epoxy putty. Wrap the plumbing tape tightly around the leak, ensuring overlap for a secure seal. If using epoxy putty, knead it until pliable, then press it over the leak, smoothing it out to guarantee full coverage.
For larger leaks or those in inaccessible areas, replace the damaged section of the pipe. Use a pipe cutter to remove the faulty portion, then attach a new piece with appropriate fittings, such as compression or push-fit connectors.
After completing repairs, turn the water supply back on and check for leaks. This step guarantees your fix succeeds and the plumbing is functioning correctly. Regularly inspect your pipes to catch future issues early.
Clearing a Jammed Garbage Disposal
When your garbage disposal jams, turn off the power at the switch and unplug it to guarantee safe troubleshooting. Safety is paramount when serving others, so ensure no power flows to the unit before proceeding. Once the disposal is safely off, follow these steps to clear the jam:
- Inspect for visible obstructions: Use a flashlight to look inside the disposal from above. Avoid using your hands; instead, use tongs or pliers to remove any visible debris carefully.
- Use the reset button: Locate the reset button on the bottom of the disposal unit. Press it firmly to reset the motor, which might resolve minor jams without further action.
- To manually rotate the blades, Insert a hex key into the hole at the bottom of the disposal. Turn it clockwise and counterclockwise to free the blades manually from the jam.
- Test the disposal: After clearing the obstruction, plug the unit back in and turn on the power. Run cold water and test the disposal to ensure it operates smoothly.
Resolving Water Heater Issues
Start by turning off the power supply to the water heater to confirm safety before you begin troubleshooting any issues. If it’s electric, switch off the circuit breaker. For gas heaters, turn the gas valve to the pilot setting. Next, check for any leaks around the water heater. Look for pooling water or dampness, which could indicate a faulty pressure relief valve or a leak in the tank. If you find a leak, tighten connections or replace the valve if necessary. For more complex issues, consider water heater repair services to restore efficiency and ensure safety.
If the water isn’t heating properly, adjust the thermostat. For electric heaters, verify the thermostat is set between 120-140°F. Remove the access panel and use a screwdriver to adjust the settings. For gas heaters, adjust the temperature dial on the front of the tank.
Sediment buildup in the tank can also impact efficiency. Drain the tank annually by attaching a hose to the drain valve at the bottom and emptying the water into a bucket. This flushes out sediment and extends the heater’s life.
Maintaining Outdoor Faucets
Outdoor faucets require regular inspection to prevent leaks and guarantee smooth operation. Begin by checking for any visible cracks or corrosion around the faucet. These could lead to leaks, which wastewater and might cause damage. To maintain your outdoor faucets, follow these steps:
- Inspect the washers and gaskets: Turn off the water supply and unscrew the faucet to inspect washers and gaskets for wear. Replace them if they’re worn out to prevent leaks.
- Check for drips: Turn on the faucet and observe if there’s any continuous dripping. If so, tighten the packing nut slightly. If drips persist, you may need to replace the washer or valve seat.
- Insulate during winter: Use faucet covers or insulated tapes to protect against freezing temperatures. This prevents pipes from bursting, saving you from costly repairs.
- Lubricate the handle: Apply a small amount of plumber’s grease to the stem and handle. This guarantees smooth operation and reduces wear over time.
Managing Sewer Odors
To tackle sewer odors effectively, begin by identifying the source of the smell, which often arises from dry traps or blocked vents. First, check your drains. Pour a gallon of water into each rarely used sink, shower, and floor drain to fill the trap with water and form a seal against sewer gases. If you suspect a blocked vent, climb to the roof and inspect the vent pipe for debris. Clear any obstructions, guaranteeing proper airflow. For additional insights, read why you should update plumbing during a bathroom remodel to prevent similar issues in the future.
Next, examine the plumbing connections. Verify that all seals and gaskets are intact and properly fitted. A small leak can allow unpleasant odors to escape. Tighten any loose connections with a wrench and replace worn-out gaskets.
For persistent odors, use a mixture of baking soda and vinegar. Pour half a cup of baking soda, followed by a cup of vinegar, down the offending drain. Let it sit for about 15 minutes, then flush with hot water. This natural solution helps break down organic material, which causes the smell.
Preventing Future Plumbing Problems
Regular maintenance is essential to prevent future plumbing problems and guarantee your system runs smoothly. By taking proactive measures, you can not only extend the life of your plumbing but also serve those who depend on its reliability. Start by inspecting your plumbing system regularly for any signs of wear or potential issues. Here’s how you can do it effectively:
- Check for leaks: Inspect pipes, faucets, and connections. Catching leaks early prevents water waste and potential damage.
- Clear drains regularly: Use a drain snake or a plunger to remove minor blockages before they escalate into major clogs.
- Inspect water pressure: Verify that your water pressure is within the recommended range (typically 40-60 psi). High pressure can strain pipes, while low pressure may indicate underlying issues.
- Install water softeners: If you live in a hard water area, installing a water softener can prevent mineral buildup in pipes.
Conclusion
You’ve got the tools to tackle plumbing issues, but did you know that 10% of homes have leaks that waste 90 gallons or more daily? Don’t let yours be one. Regular inspections and quick fixes like replacing washers or sealing leaks can save water and money. Remember, keeping your plumbing in top shape isn’t just about repairs but prevention. By staying proactive, you’ve ensured a healthy, efficient plumbing system for years.
Frequently Asked Questions
How Can I Winterize My Plumbing to Prevent Freezing?
Drain your outdoor hoses, shut off exterior valves, and insulate exposed pipes with foam sleeves. Open cabinet doors to let warm air circulate. Consider setting your thermostat above 55°F to prevent freezing and protect your plumbing.
What Are the Signs of a Malfunctioning Water Softener?
You notice the water’s hard as a rock, reminiscent of bygone days. Check for soap scum buildup, scale on faucets, or changes in water taste. Inspect the brine tank, ensuring salt levels aren’t low.
How Do I Locate My Home’s Main Water Shut-Off Valve?
To locate your home’s main water shut-off valve, check near your meter, typically in the basement or garage. Follow the main water line entering your house. Make certain it’s accessible for quick shutdown during emergencies.
What Should I Do if My Water Bill Suddenly Spikes?
When your water bill spikes, think of it as a lighthouse signaling hidden leaks. Check faucets, toilets, and outdoor hoses. Listen for drips and inspect for damp spots. Finding and fixing leaks saves water and future expenses.
How Can I Prevent Sediment Buildup in My Plumbing System?
To prevent sediment buildup, flush your water heater annually. Regularly clean faucet aerators and showerheads. Install a sediment filter on the main line. Monitor water pressure, ensuring it stays within recommended levels to reduce sediment accumulation.